To setup a new vpn connection in Windows 7 you need to do these simple steps.
1. Go to your desktop.
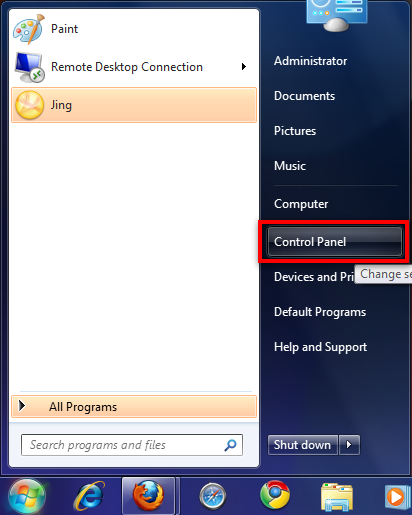
2. Once at your desktop click on your Start menu button, and select the Network tab.
3. Once the Control Panel window appears click the “Network and Internet” icon
4. When the Network and Internet window appears, please click on the “Set up a new connection or network” link

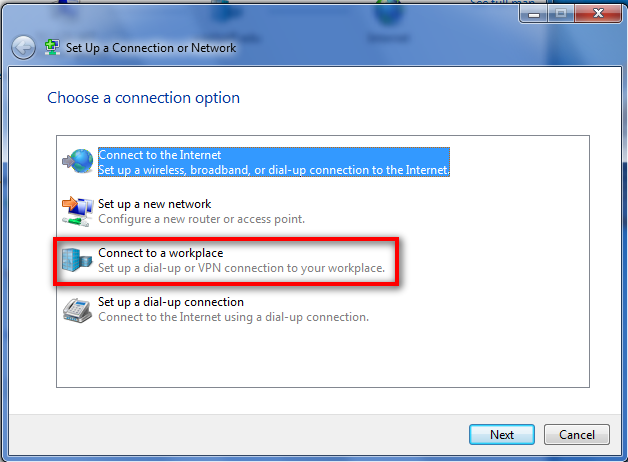
5. Scroll down to the bottom of the window and highlight the “Connect to a workplace” icon (highlighted by the red rectangle), then click the next button
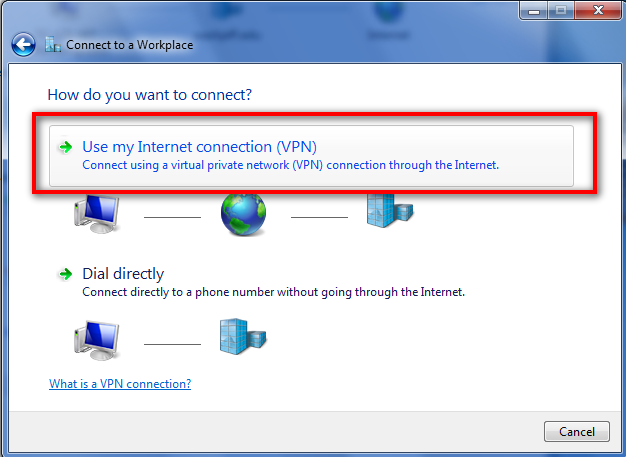
6. Picture 1, this window will show when you have no existing connections to other networks. Double click the icon that says “Use my internet connection (VPN)”
Picture 2, this window will appear if you have an existing connection to other networks, don’t worry this will not affect your ability to connect to the W&J network, leave the “no, create a new connection” balloon selected and click the next icon in the bottom right of the window.

7. A window should appear, in the “Internet Address” bar type vpn server address In the “Destination Name” bar, you may name the network anything you like, type “VPN Connection” The balloon highlighted by the yellow box can be turned on or off depending on how many people use your computer, I have clicked mine on because I am the only user on my computer. If you choose to turn this on a Windows Security window will appear, when it appears please click the “allow” area or the “continue” button. Then click the balloon next to the text “Do not connect now, just set it up so I can connect later” Then click the “next” button in the bottom right of the window.

8. In this window type in your username and password. We would suggest leaving the “remember my password” balloon for security reasons. Then click the “create” button in the bottom right of the window.

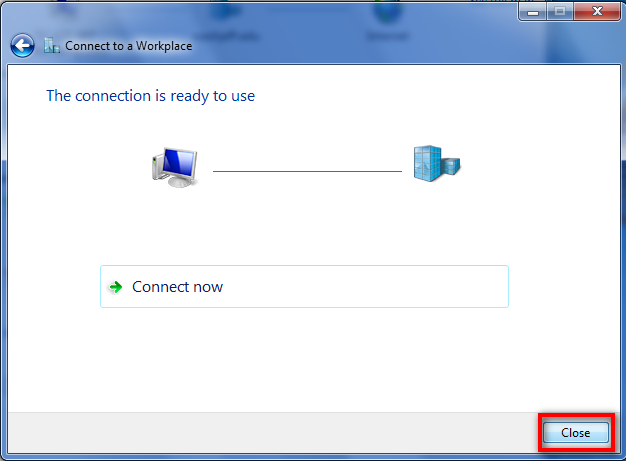
9. On the next window please refrain from clicking the connect now icon, please close the window and pull up “Connect to” window (if you click the start button again and look one tab beneath the “networks” tab you will see the “Connect to” shortcut).
10. Please on the “Connect to a network” link in the Network and Internet window, and a small window should appear in the bottom right of your screen (looking something like the second picture of this step) In the window, which appears after you click the “Connect to a network” link, please right click the connection we just crated and selected the properties option.


11. Please match the options tab with the picture below, to make sure everything is in the correct set-up. Once everything looks identical please click on the Security tab at the top of the window

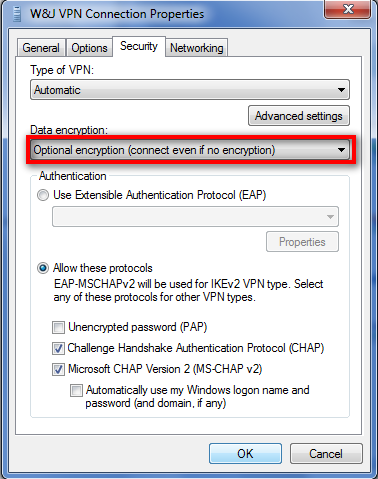
12. Again please make sure that your window looks the same as the one in the picture below.
13. Now click on the networking tab at the top of the window. Please match up the window to look the same as the one shown. Then click the “ok” button on the bottom of the window.

14. Please either right click on the connection and select connect or double click on the network that we have been working on, to connect to it.

15. A window will appear that again asks you for your username and password. Once you have entered those two items, you may click the “connect” button in the bottom left of the window.

You are now connected to the VPN server through a secure VPN connection. If you are getting connection errors, or getting disconnected constantly from the vpn, please contact us via the support email and we will do our best to troubleshoot your issue